

Through the previous post the device was finished. Now for the server side.
What it means to handle biometric data
This is the part I cared about most in this project. These are students’ fingerprints.
Per the Personal Information Protection Commission’s biometric data protection guidelines, the fingerprint DB is a standalone database completely separated from the other Dimipay service DBs, running on AWS RDB. Stored data is encrypted, inbound traffic is restricted to the Dimipay server IP, and outbound traffic isn’t permitted at all.
The SourceAFIS Java web server that connects directly to the fingerprint DB has the same setup as in V1. It’s only reachable on the internal network, and it uses token authentication even within that network in case of an SSRF attack. “It’s the internal network, it’ll be fine” means nothing in the face of SSRF.
Fingerprint enrollment
Users enroll at a dedicated enrollment kiosk by default — not at the payment terminal.
It takes at least three fingerprint images via the three-frame averaged capture described in the previous post. It then cross-matches those images, and if the score doesn’t clear the approval threshold it takes additional captures. In effect it repeats until cross-matching three images yields a combination above the threshold, and if that repeats more than ten times it rejects enrollment as below standard.
Enroll a poor-quality template and that person suffers from FRR on every payment. It has to be filtered at the enrollment stage.
Once high-quality images are secured, the user’s payment QR is scanned to register them to the account.
There’s one more step. At enrollment time, the fingerprint being registered is matched against the entire fingerprint DB. If it clears the safety threshold score but is already registered to another user’s account, enrollment is refused. This blocks registering a fingerprint to someone else’s account.
A single user can also hold multiple bundles of minutiae records sharing the same name. That lets you enroll the same finger several times under one name to mitigate FRR, or enroll different fingers separately under distinct names.
Fingerprint deletion
Fingerprint groups can be managed from the app — deletion, renaming a group, and so on.
If a user requests deletion in the app because they no longer want fingerprint payment, or if they graduate so the data is no longer needed, it is deleted from the operational DB immediately, per Article 21 of the Personal Information Protection Act.
That said, it may persist in disaster-recovery backups for up to three days, depending on the backup rotation cycle. During that period the data cannot be accessed or processed by the service, and it is permanently destroyed as soon as the backup retention period expires.
DFU
This is a feature I added while maintaining the system.
Going to the store, disassembling the terminal, plugging in a J-Link, flashing, and reassembling for every single firmware fix was seriously inefficient. So I set it up so the kiosk can push updates in bulk over Bluetooth.
Firmware dev ──Tag Push──▶ GitHub ──▶ Dokploy auto build ──▶       RustFS
                                            ▲                  (firmware.bin)
                                            │                        │
                                   Internal Registry                 │
                                   (NCS Toolchain Image)             │
                                                                     │
                Backend ──version info──▶ Kiosk ◀──── Firmware ──────┘
                                           │
                                           ▼
                                   Versions identical?
                                      │        │
                                     Yes       No
                                      │        │
                                      ▼        ▼
                                  Keep as-is   Run DFU
When I write firmware, tag the commit, and push to GitHub, Dokploy builds it and deploys the .bin to the internal RustFS. The kiosk periodically compares the active firmware version relayed from the fingerprint sensor and the backend, and if they differ it gets a presigned firmware URL from the backend and downloads the firmware.
There was one problem here: building nRF54L15 firmware requires NCS (the nRF Connect SDK), and setting that environment up on every build makes builds far too long. So I pushed a Docker image with that environment preconfigured to the internal registry and pull that image instead.
The firmware the kiosk downloads is applied to the sensor roughly like this.
Kiosk update command
        │
        ▼
   Receive Ready response
        │
        ▼
   Send firmware
        │
        ▼
  Stream into flash slot 2
        │
        ▼
     CRC verification
        │
        ▼
 Mark slot 2 pending
        │
        ▼
  Report status, then reset
        │
        ▼
 MCUboot applies new firmware
Pending is only marked after everything lands in slot 2 and passes CRC. If BLE drops mid-transfer or the image is corrupted, pending never gets marked, so on reset it simply boots the existing firmware. No bricking.
Performance
V1 ├──────────── 3.80 ────────────┼0.30┼── 1.00 ──┼─0.70─┤  5.80s
V2 ├0.36┼──0.63──┼0.15┼─0.24─┤                          1.38s
                          ┊
                   requirement 2.0s

■ Fingerprint image read ■ Image processing · 1bpp packing ■ Device→iPad (BLE) ■ Server round trip| Stage | V1 | V2 |
|---|---|---|
| Fingerprint image read | 3.80s (UART) | 0.36s (SPI) |
| Image processing · 1bpp packing | 0.30s | 0.63s |
| Device → iPad (BLE) | 1.00s | 0.15s |
| Server round trip | 0.70s | 0.24s |
| Total | 5.80s | 1.38s |
V1’s average authentication latency of 5.8 seconds was cut to 1.18 seconds in V2, achieving roughly a 79.7% reduction in latency. The biggest bottleneck, sensor→MCU transfer, dropped from 3.8 seconds over UART to 360ms over SPI — about 90.5% less. That satisfied the original requirement of authenticating within 2 seconds.
The fun part is that image processing time actually went up (0.30s → 0.63s). An algorithm that walks a local-window standard deviation per pixel is that heavy. But it used that to cut 8bpp down to 1bpp, taking BLE transfer from 1 second to 150ms, so it’s a pure win. It didn’t move the bottleneck — it reduced the total.
Results
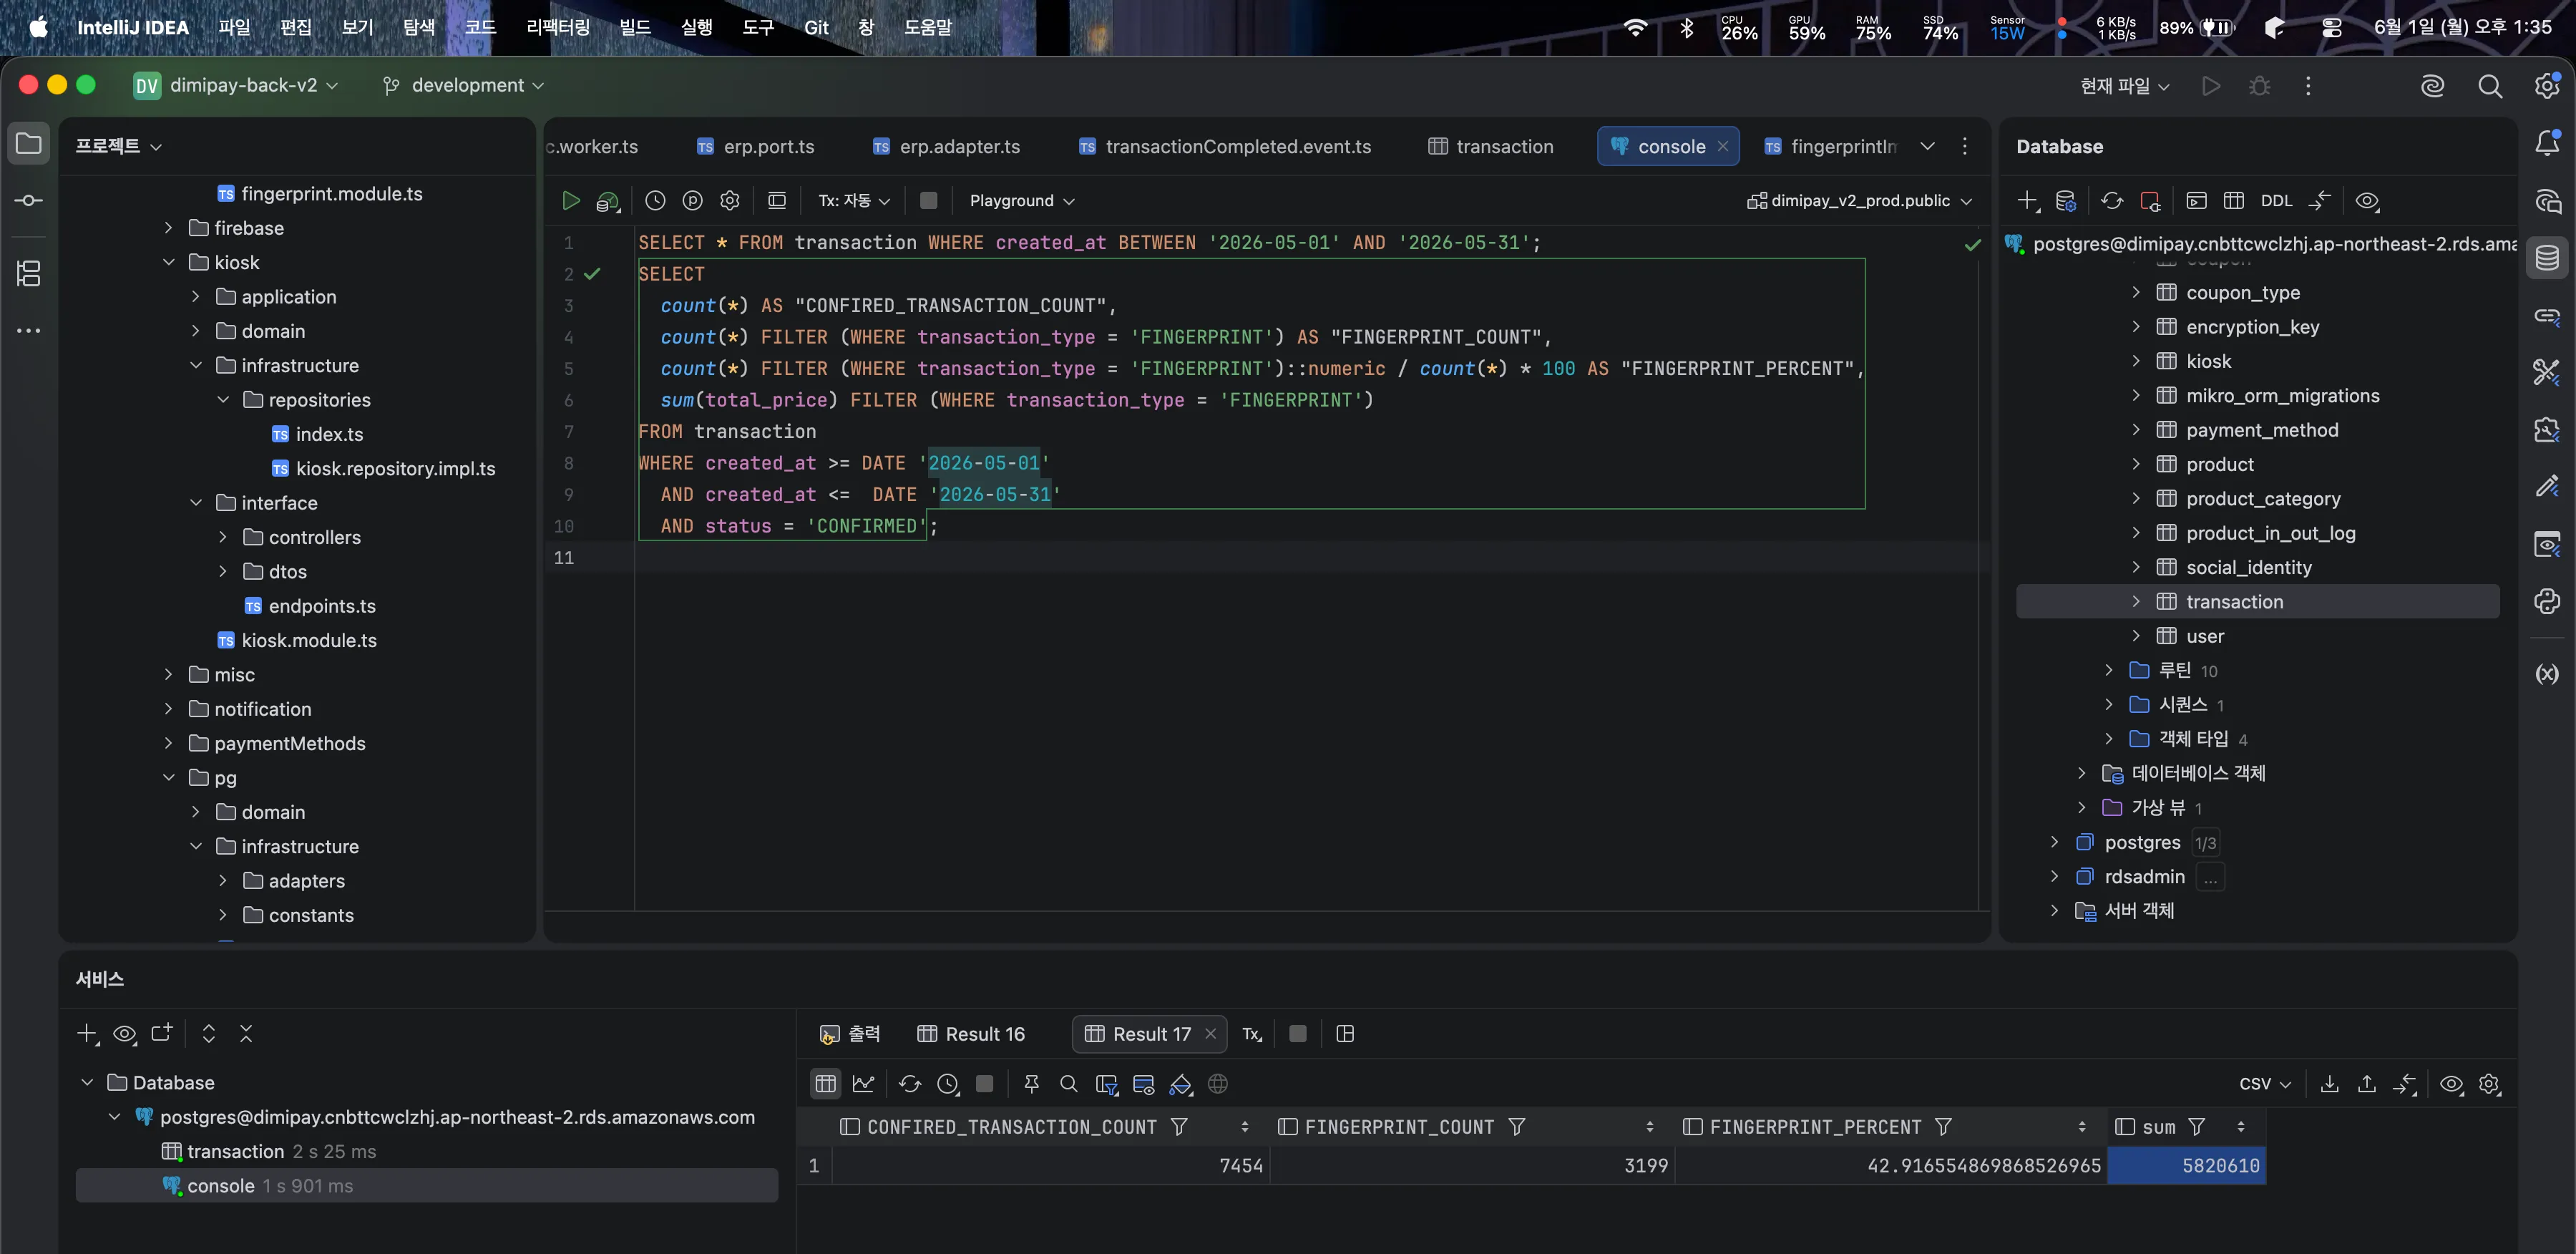
Of the 7,454 successful payments during the single month of May 2026, 3,199 — about 43% — went through fingerprint recognition. Fingerprint payments alone accounted for ₩5.82 million in monthly transaction volume.
You can now buy food at the store without a phone.
Wrapping up
Looking back, this project had two turning points.
One was measuring the time broken down by stage in V1. Had I stopped at “it’s slow,” I’d have ended up fiddling with compression algorithms and nothing more. Only after seeing that 3.8 seconds was concentrated in the single UART segment did I conclude the interface choice itself was wrong, which is what sent me back to picking a sensor.
The other was continuing to dig into the cause of the DECA oscillation even after the problem was fixed. Adding C31 fixed it, so I could have let it go there. But the fact that my explanation didn’t match the diagram kept bothering me, and only much later — while working on a completely unrelated project and learning that an LDO is an active device — did it all add up.
I’m freaking awesome.